 Hoy les voy a mostrar cómo se hace un archivo con sobres de C5 y con uno de los motivos de Ladybug and Friends. Yo uso mi archivo para archivar los motivo que ya están dibujado. Es genial!
Today I will show how to make an archival folder with envelopes of size C5 with motives from Ladybug and Friends. I use my archival folder to archive the motives that I have painted. It´s a perfect match.
 Se necesita sobres de C5 cortado por la mitad, carton cortado de tamaño 5 x 7 inches, papel cortado en 6 x 8 inches y papel 5 x 2 inches.
 Primero se cubre el carton con el papel.
 Pegar la cartulina de 5 x 2 entre dos sobres.
 Se necesita sobres de C5 cortado por la mitad, carton cortado de tamaño 5 x 7 inches, papel cortado en 6 x 8 inches y papel 5 x 2 inches.
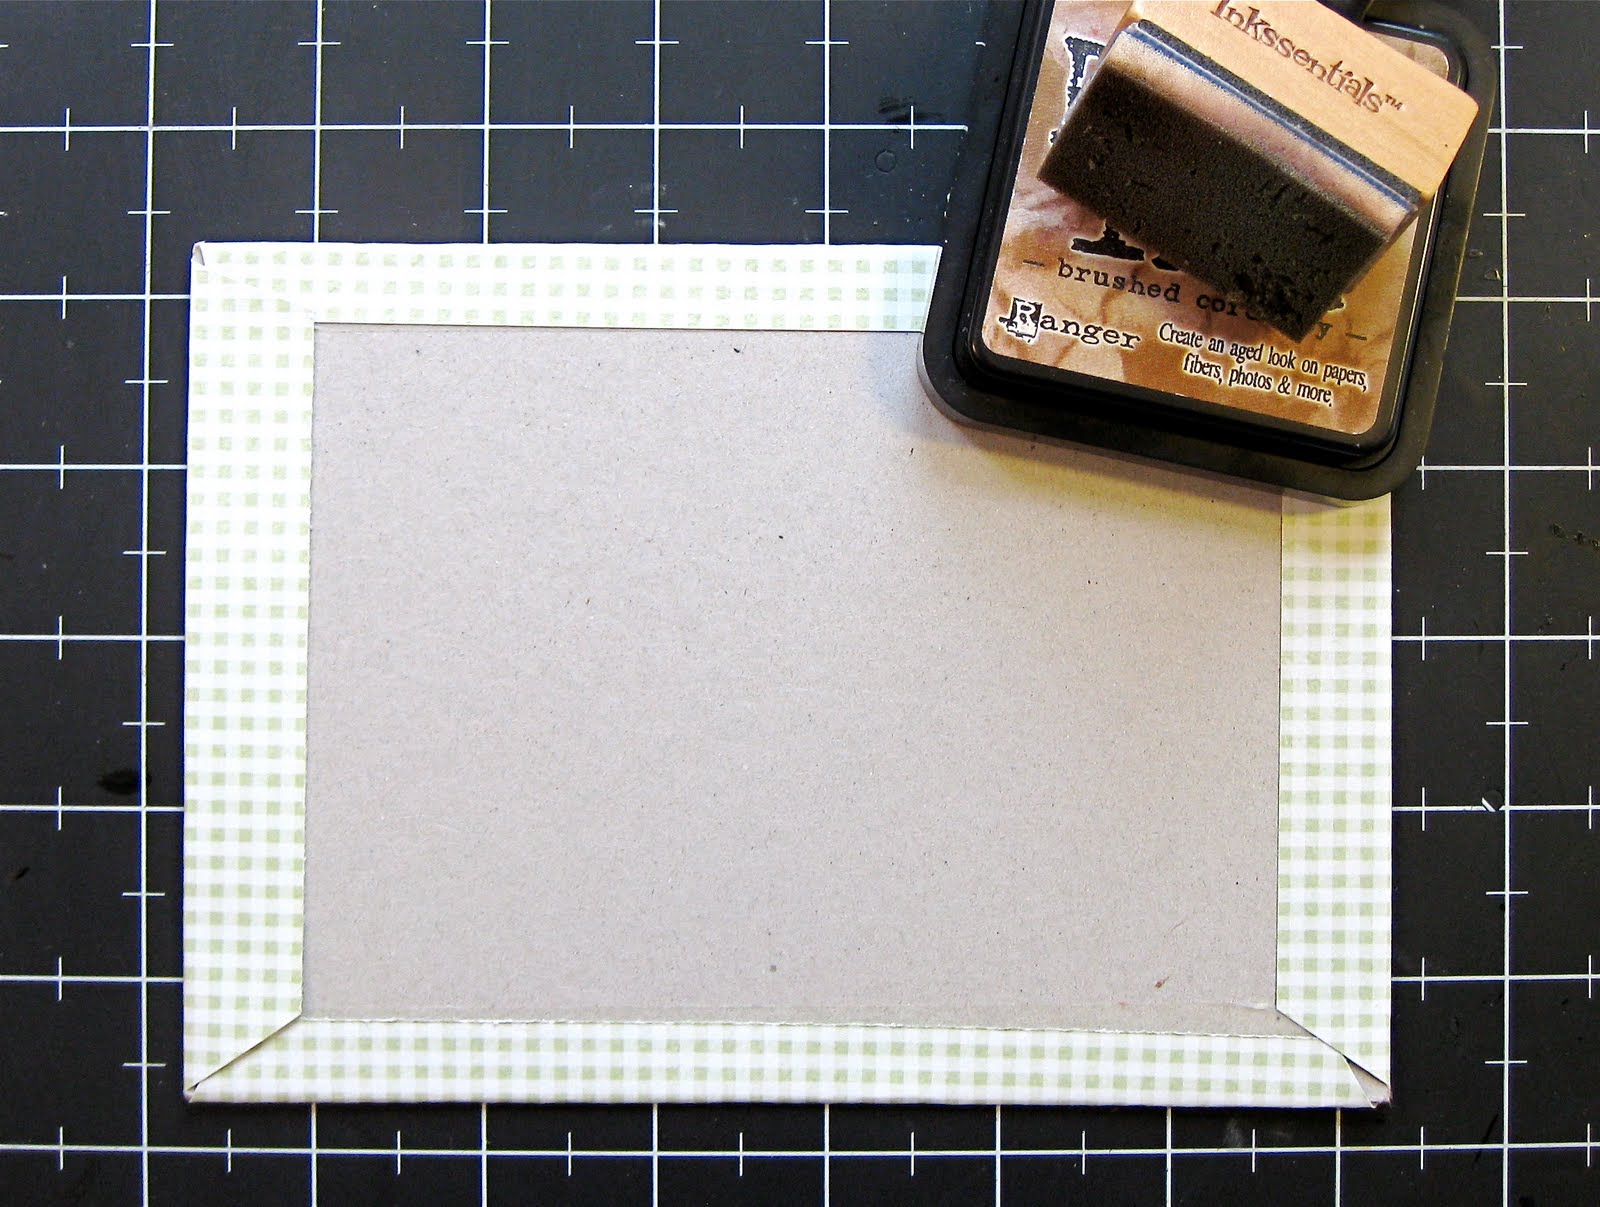
You need envelopes of C5 cut in half, the cardboard cut to 5x7 inches, patterned paper cut to 6x8 inches and 5x2 inches.
 Primero se cubre el carton con el papel.
First, cover the cardboard with the patterned paper.
 Para decorar los lados he usado Distress Ink.
 Para decorar los lados he usado Distress Ink.
For decoration of the sides, I have used Distress Ink.
 La cartulina de medida 5 x 2 se devide en dos. En este archivo he usado la medida 6 x 2, y he descubrido que no resulta muy bien... por eso la foto no esta correcta.
 La cartulina de medida 5 x 2 se devide en dos. En este archivo he usado la medida 6 x 2, y he descubrido que no resulta muy bien... por eso la foto no esta correcta.
Divide the patterned paper of 5x2" in two. In this archival box, I have used a size of 6x2" and have found that it did not turn out very well... for that reason, the foto is not 100% correct.
 Pegar todos los sobres, solo en la mitad del sobre y cuidar que se abren por el mismo lado.
 Pegar todos los sobres, solo en la mitad del sobre y cuidar que se abren por el mismo lado.
Glue all the envelopes together in the middle of the envelope and be careful that all envelopes open on the same side.
 Pegar la cartulina de 5 x 2 entre dos sobres.
Glue the 5x2" patterned paper between two envelopes.
 Así tienes un archivos para tus timbres o para otra cosa:)
 Así tienes un archivos para tus timbres o para otra cosa:)
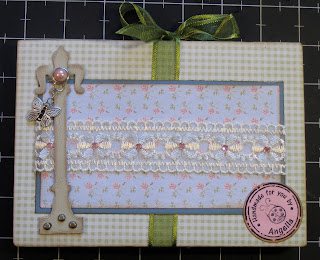
This way you end up with an archival folder for your stamps or for other things :)
 Decorar por frente y por atras. Recuerda que la cinta no se tiene que pegar con pegamento. La cartulina que está encima solo va pegada a los lados, para que la cinta se puede mover.
 Decorar por frente y por atras. Recuerda que la cinta no se tiene que pegar con pegamento. La cartulina que está encima solo va pegada a los lados, para que la cinta se puede mover.
Decorate the front and back. Remember that you cannot use glue on the ribbons. The over laying patterned paper is only glued on the side, so the ribbon can move.
 Supplies
 Supplies
Stamps: EB Birthday surprise,
Accessories: Ribbons, Charms, Bling, flowers
Tools: Spellbinders - ovals scallop, Sizzix Bigz Die (Hardware Findings by Tim Holtz)
Color medium: Promarker, All the edges are distressed with Distress Ink,
9 kommentarer:
Kjempeflott tutorial og flott folder - nydelige papirer!
Ha en fin lørdag!
Klem, Bente
Så flott mappe og tutorial du har lagd :)
Ha en fin helg, klem :)
Wow, denne ble flott! Må prøve selv en dag! :) Ha en super helg! Verdagen starter for meg igjen på mandag! Klem
Den var jo kjempeflott. Nydelig pyntet, og flotte papirer.
Lagrer den med en gang.....
Y tan bueno que se escribe en español, entonces yo "practica" un poco, aunque yo uso Google Translator.
Abrazos de Kaia
What a great tutorial! Thanks for sharing
Hei, hei :)
Så utrolig nydelig mappe og takk for at du deler:)
Håper du har hatt en finfin tur!!!
Klemmer:)
En kjempe flott arkivmappe, Angella!
Nydelig mønster ark!!
Ha en fin tirsdag! Klem Laila.
Så mye lekkert du lager, min første tur innom her - men absolutt ikke den siste :)
la meg til som følger og la deg til på bloggen min.
Klem fra Anja
This design is spectacular! You obviously know how to keep a reader entertained. Between your wit and your videos, I was almost moved to start my own blog (well, almost...HaHa!) Wonderful job. I really enjoyed what you had to say, and more than that, how you presented it. Too cool!
Legg inn en kommentar